A stud finder detects a change in whatever it is designed to sense behind the wall surface — usually a shift in density (for magnetic and capacitive models) or the presence of metal fasteners and edges. Most consumer models do not “see” wood directly; they infer a stud’s edges from an indirect signal, which is why they can be fooled.
What is actually inside the wall that a stud finder responds to?
Behind most interior drywall sits a timber or metal frame, spaced at regular intervals, with the drywall screwed or nailed to it. A stud finder is not detecting “wood” as a material. It is detecting one of two things: a change in the density of what lies behind the wall surface, or the metal fasteners and hardware embedded in it.
That distinction matters more than most buyers realise. Two stud finders can use completely different physics to arrive at the same little arrow or beep, and each has its own blind spots.
How do capacitive stud finders actually work?
A capacitive stud finder senses changes in the electrical capacitance of the wall as it passes over it, which shifts when there is a solid framing member (or other dense material) behind the drywall compared with the hollow cavity next to it. It is measuring density contrast, not the stud itself.
These are the common “sweep across the wall until it beeps” tools. Inside is a sensor plate that reads the wall like a capacitor, and the reading changes as the amount of material behind the surface changes. A solid stud behind drywall reads differently than an air-filled cavity. The tool is calibrated on a clear patch of wall first, then swept sideways, and it signals when the reading crosses a threshold that suggests something dense start or ends.
The trouble is that “dense” is not the same as “stud.” A capacitive sensor can be fooled by:
- Double or built-up thickness of drywall behind a patched area
- A thick layer of joint compound, tile backer, or plaster
- Wiring, plumbing, or insulation bunched close to the surface
- A structural detail like a header, blocking, or a doubled-up stud at a corner
None of those are the 38 or 89 mm timber the reader is actually hunting for, but a capacitive tool can flag them as if they were.
How do magnetic stud finders work, and why are they different?
A magnetic stud finder does not sense the stud at all. It senses the metal fasteners — nails or screws — driven into the stud to hold the drywall in place. It is detecting hardware, and inferring the stud’s position from where that hardware clusters.
This is a genuinely different approach from a capacitive tool, and it explains why a magnetic model behaves so differently in use. A magnetic stud finder is essentially a small, sensitive magnet or magnetic sensor. It is pulled toward, or gives a stronger reading near, the ferrous fasteners holding the drywall sheet to the frame. Because those fasteners are driven in a predictable pattern along the centre of each stud, a magnetic finder can pinpoint a stud by finding two or three fastener heads in a vertical line.
Magnetic finders tend to need less calibration and have no batteries to fail, but they can miss a stud entirely if the installer used adhesive rather than mechanical fasteners in that section, or if the fastener spacing is wide. They also cannot distinguish a nail holding drywall from a random screw, picture hook remnant, or bit of wire mesh, so a hit still needs interpreting.
Why do stud finders sometimes give a false reading?
A stud finder gives a false reading when whatever it is measuring — density or metal — appears somewhere other than a stud. Common causes include multiple drywall layers, other framing members like blocking and headers, electrical boxes and wiring, and plumbing runs close to the surface.
Because both major stud finder types are working from an indirect signal, “confidence” in a single reading is misplaced. A few situations worth expecting rather than being surprised by:
- Corners and openings. Door and window openings are usually framed with extra timber (jack studs, headers, cripple studs), so readings near them can be dense and confusing in ways that do not match the regular stud spacing found elsewhere on the same wall.
- Older plaster-and-lath walls. The lath strips themselves can register as a density change, giving a rhythm of false positives that has nothing to do with the studs behind them.
- Insulated or retrofitted walls. Rigid foam board, added soundproofing layers, or rewiring work can all sit between the finder and the framing, changing what the sensor reads.
- Metal versus timber framing. Commercial and some newer residential builds use light steel studs, which read very differently to timber and can require a stud finder mode built specifically for metal.
None of this means the tool is broken. It means the reading is a clue, not a verdict.
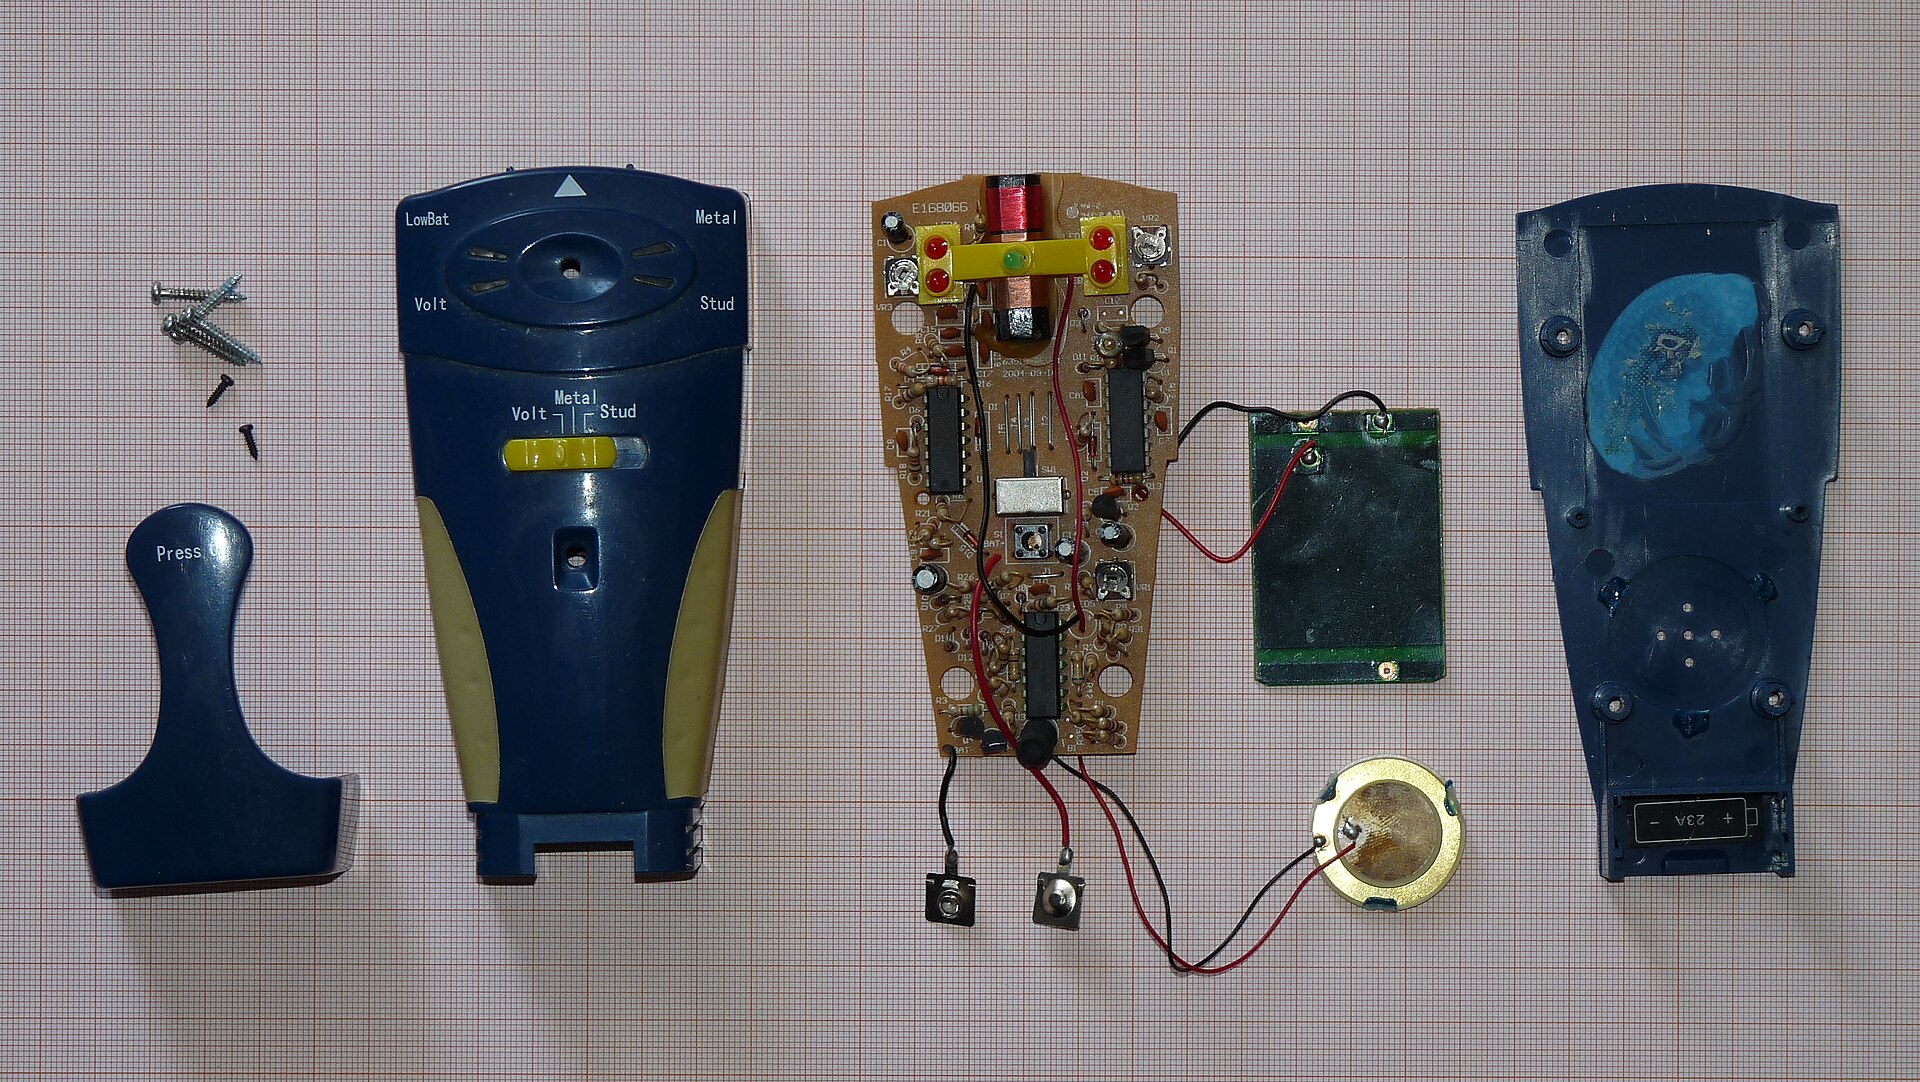

How can a reader confirm a stud finder’s reading before drilling?
A reading is best confirmed with a second, independent method — checking for consistent spacing along the wall, tapping to compare the sound of hollow versus solid sections, or making a small test hole in an inconspicuous spot before committing to a larger fixing.
Framing in most homes follows a regular spacing pattern, so once one stud is found, measuring across should locate the next one at a predictable interval. If the second and third readings do not line up with that pattern, it is worth treating the first reading with more suspicion, not less.
Tapping the wall with a knuckle is a genuinely old but still useful cross-check: a solid, low thud usually means framing behind the drywall, while a hollow, higher-pitched sound means open cavity. It will not replace a stud finder, but it is a free second opinion that uses a completely different physical cue.
Where more certainty is genuinely needed — hanging something heavy, or checking before any work that could affect wiring or plumbing hidden in the wall — a small pilot hole in a spot that will be covered by a fixing plate or picture is a common way to physically confirm a stud before committing to a bigger hole or a heavier fastener. Anyone unsure whether a wall contains structural elements, or planning anything that could affect load-bearing framing, should treat that as a question for a qualified tradesperson rather than something to resolve by drilling test holes and guessing.
What PPE and precautions matter when working near walls?
Cutting into drywall or plaster throws dust that is unpleasant to breathe and, in older buildings, can include materials worth treating cautiously. Eye protection and a suitable dust mask are sensible for any drilling or cutting into a wall surface, and a work light helps confirm what is actually being drilled before it happens.
Because studs sit close to wiring and, in some walls, plumbing, any drilling deeper than a shallow test hole carries a real risk of hitting a cable or pipe. A stud finder cannot substitute for the caution that hidden services deserve. Where there is any doubt about what runs behind a wall — particularly in kitchens, bathrooms, or near switches and outlets — that is a question for a licensed electrician or plumber, not something to test by drilling further.
Does a stud finder replace a tape measure and level?
No. A stud finder only locates framing; it does not confirm that a fixing point is level, square, or spaced correctly relative to other marks on the wall. It is normally used alongside a tape measure, a pencil, and often a level to lay out the actual fixing points.
Once a stud’s approximate centre is found, most people mark it, then use a tape to project that mark up or down the wall, and a level to keep a run of fixings straight. The accuracy of that tape measure matters here too — small reading habits can shift a mark by more than expected, which is covered in more detail in what accuracy actually means on a tape measure, and the loose hook at the end of most tapes is explained in why the hook on a tape measure is loose.
For checking that a shelf or fixing sits level once the stud is marked, a spirit level remains the simplest tool, and understanding what its bubble is actually telling you is worth a look at what a spirit level’s vial is actually telling you. For longer runs across a wall, some people reach for a laser level instead, though it comes with its own limits, covered in what a laser level actually does and where it falls short.
What should a buyer actually compare between stud finder models?
Worth comparing: whether a model is capacitive, magnetic, or a combination; whether it has a mode for metal studs and wiring detection; how it indicates a reading (light, sound, or both); and how it is calibrated before use. None of these determine which model is “better” in general — they determine which is suited to a particular wall.
A few practical comparison points that matter more than marketing claims:
- Detection depth claims. Manufacturers often quote a maximum detection depth, but that figure is usually measured under ideal conditions and can be optimistic for a real, painted, textured, or multi-layered wall. Treat it as a rough ceiling, not a guarantee.
- Metal and wire detection modes. Some combination units add a mode aimed at flagging live wiring or metal pipework, which can be a genuinely useful extra warning layer, though it should not be the only check before drilling.
- Display type. Simple LED-and-beep units are harder to misread than ones with a bar graph or scrolling display, which can tempt users to over-trust a marginal signal.
- Calibration requirement. Capacitive models generally need to be zeroed on a known clear patch of wall before each use; skipping that step is a common cause of false readings.
These are the kind of trade-offs discussed more generally in the site’s guide to choosing and comparing tools, and stud finders sit alongside other layout and detection tools covered in the measuring and layout section.
Where does a stud finder fit alongside other layout tools?
A stud finder answers one narrow question — where is the framing — and hands off to ordinary layout tools for everything else: marking, squaring, and levelling the actual fixing points. It works best as one step in a short sequence, not as a stand-alone answer.
For marking an accurate line once a stud is found, a try square or combination square helps keep a mark square to an edge or to the floor; the difference between checking accuracy and just eyeballing it is explained in what a try square is and how to check one and in what a combination square does and why it gets used so often. Readers building a small home tool kit from scratch may also find it useful to browse the wider tool guide hub, which covers how measuring, hand, and power tools actually work, or the hand tools archive and buying guides archive for related decisions.
Used this way — as one clue confirmed by a second method, rather than a final answer — a stud finder does the job it is actually built for: narrowing down where to drill, not guaranteeing what is behind the wall.
Find Tool publishes general information, not professional advice. Power tools, mains electricity and workshop machinery are genuinely dangerous, and the safe settings, guards and procedures differ between models — always follow the manual and the markings on the tool in front of you rather than a general guide. Never remove or defeat a guard or safety feature. Anything involving fixed wiring, gas or structural work belongs to a qualified tradesperson. Wear the eye, ear and respiratory protection the task calls for.
Featured image: Photo by Dmitry G, source, CC BY-SA 3.0