A dial indicator measures very small amounts of movement — typically a few thousandths of an inch or a few hundredths of a millimetre — and displays that movement on a dial with a sweeping needle. It is used to check that something is straight, flat, round, level, or moving exactly as far as it should, rather than to measure a fixed length.
How does a dial indicator actually work?
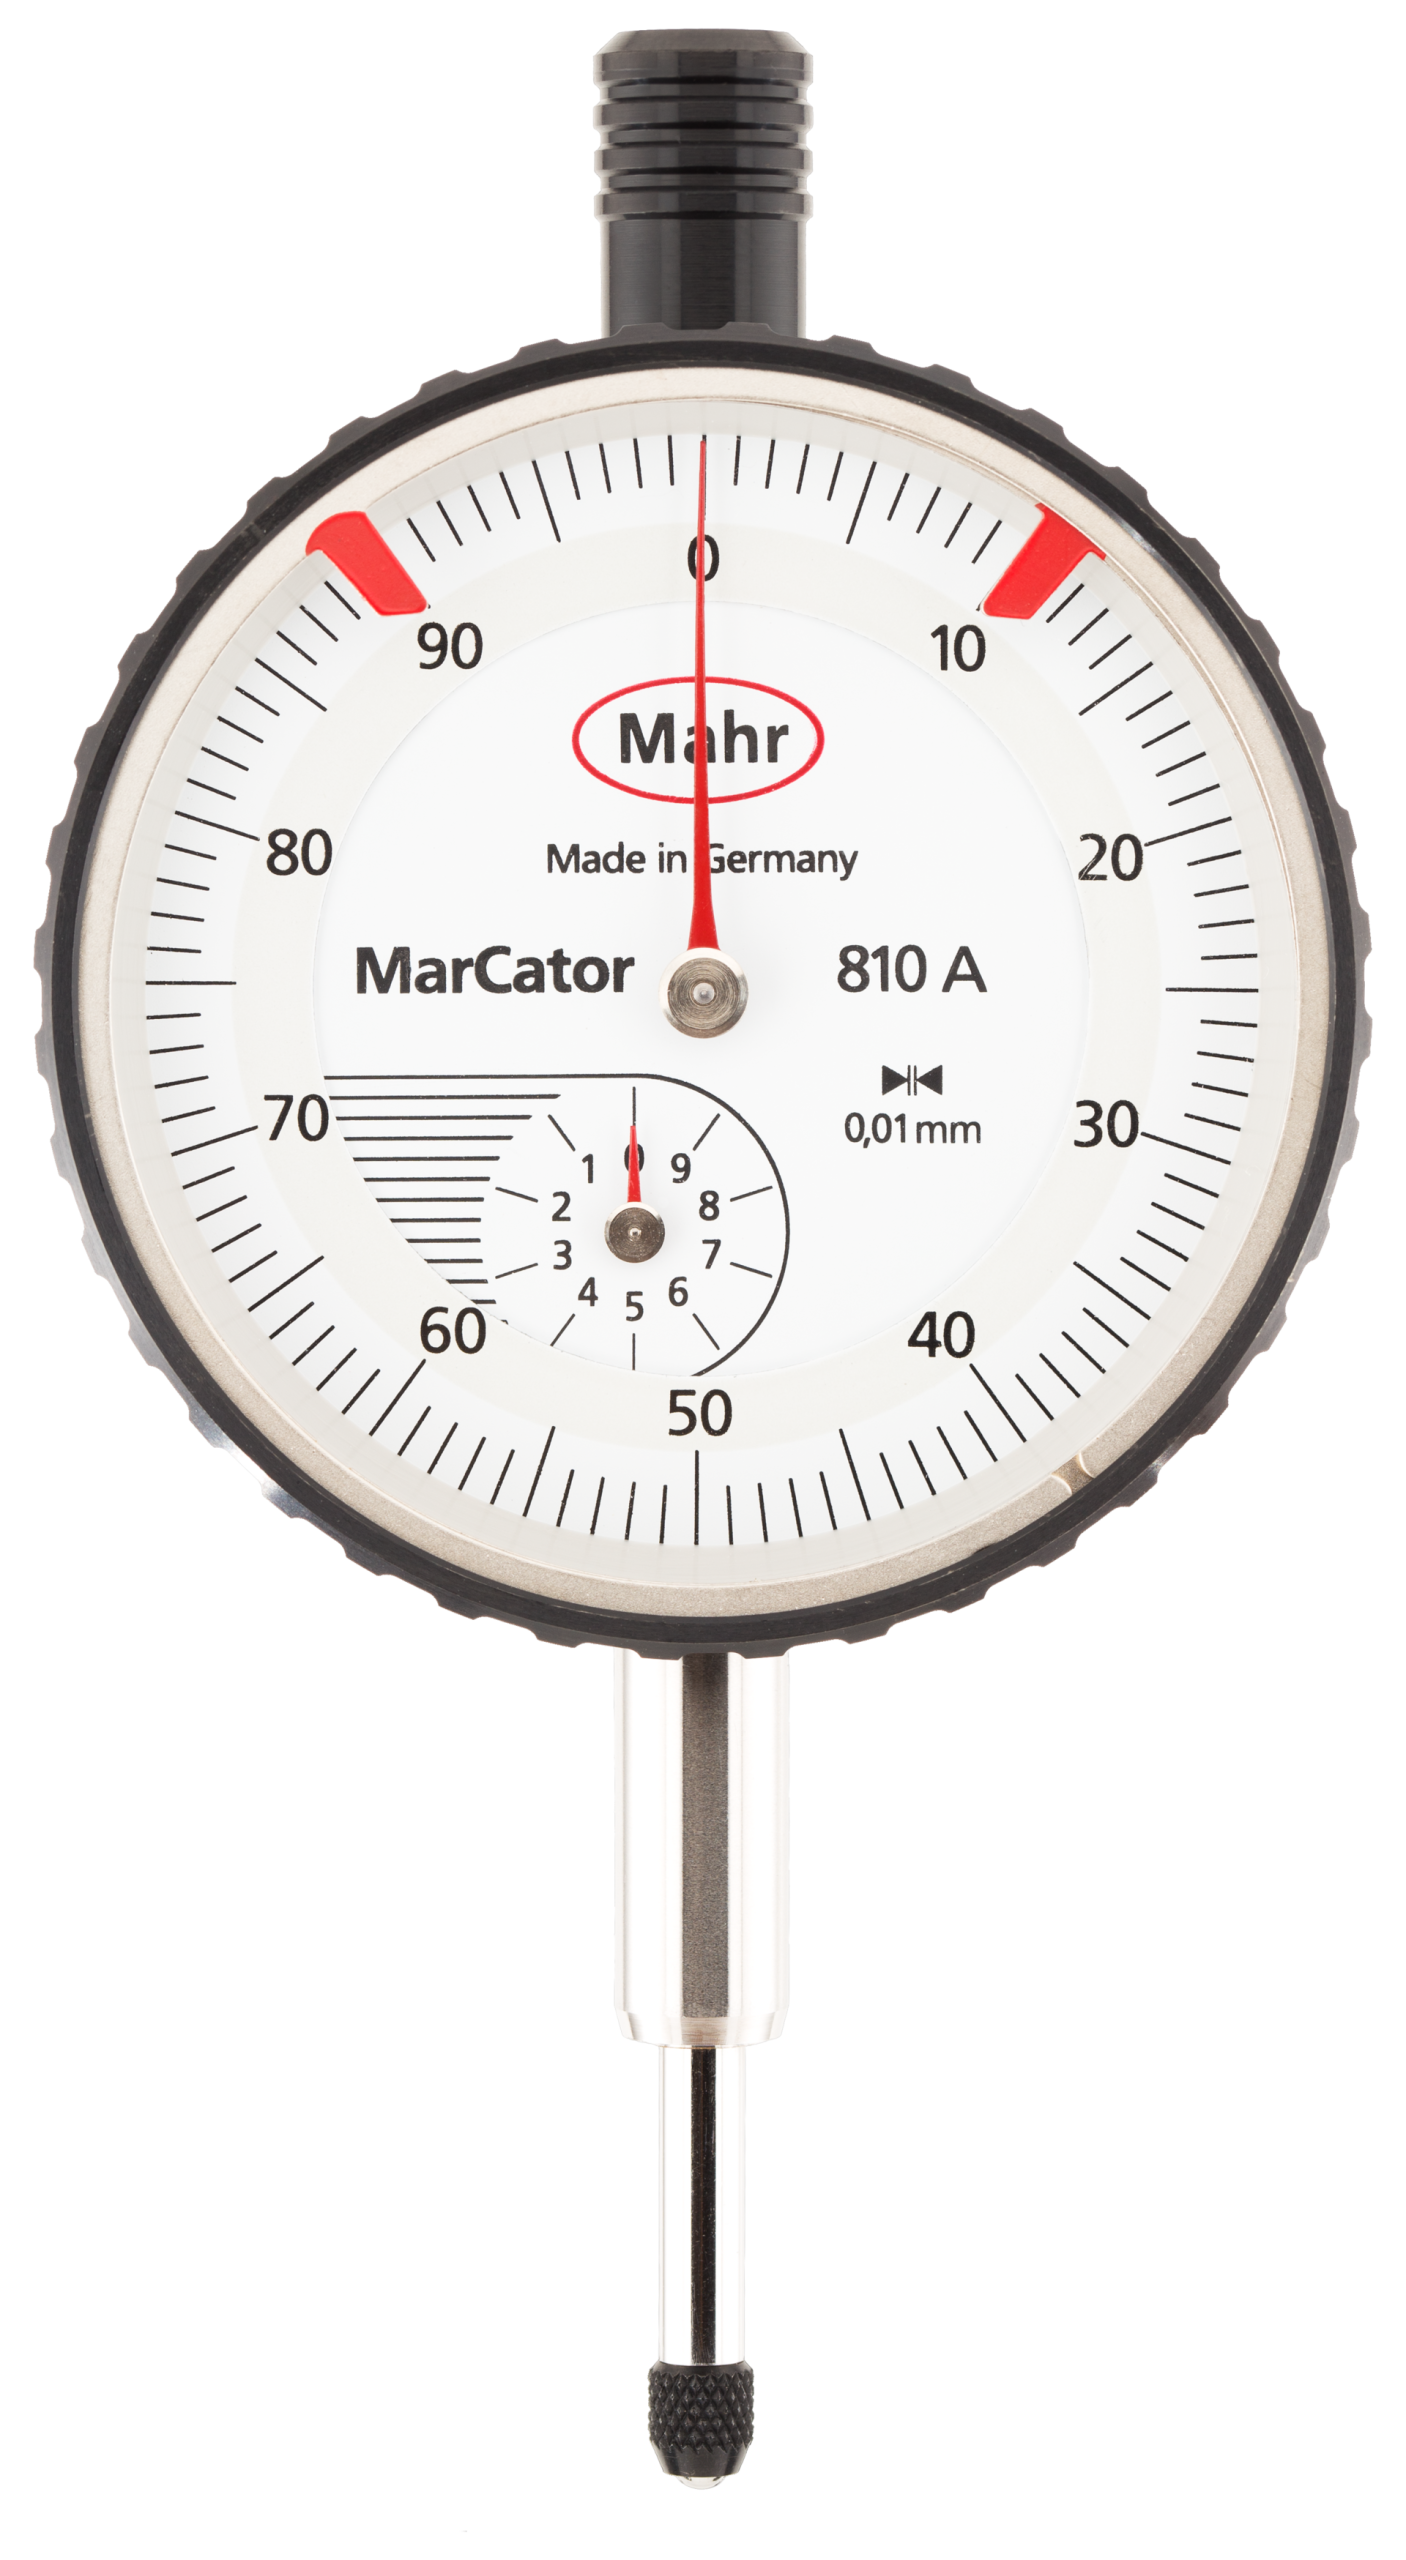
A dial indicator has a spring-loaded plunger or a pivoting lever that touches the surface being checked. As that surface moves, or as the indicator is moved across it, the plunger travels in or out. A gear train inside the body converts that tiny linear movement into a rotation of the needle on the dial face, magnifying a movement you could never see with the naked eye into something you can read clearly.
Two main types turn up in home workshops. A plunger-style dial indicator reads movement along the axis of its stem, which suits checking things like flatness or up-and-down runout. A lever-type, sometimes called a test indicator, has a small pivoting arm and can get into tighter spaces, which suits checking round parts spinning in a lathe or drill chuck.
What is a dial indicator used for in the workshop?
Dial indicators earn their keep wherever a job depends on something being consistent rather than on a single measured length. Common uses include:
- Checking that a lathe chuck or drill chuck runs true, with no wobble as it spins
- Confirming a machine table or fence is parallel to a blade, bit or spindle
- Measuring how flat a surface is across its length, by sweeping the indicator over it
- Checking backlash or play in gears, bearings and shafts
- Setting up a workpiece square and level in a vice or on a mill table before cutting
- Comparing several parts against a reference to see which are within tolerance
What ties all of these together is that the reader is not trying to find out “how long is this”, but “how much does this move, or how far off is this, compared with where it should be”. That is the job a dial indicator is built for.
How is a dial indicator different from a caliper or micrometer?
A caliper or a micrometer measures an absolute dimension — the length, width or diameter of a part, read directly off a scale. A dial indicator measures relative movement or deviation from a reference point, and on its own it does not tell anyone a real-world dimension at all.
That distinction matters when choosing equipment. If the question is “how thick is this stock”, a caliper or micrometer is the right tool, and it’s worth understanding how a vernier caliper is read and what a micrometer can measure that a caliper cannot. If the question is “does this shaft wobble” or “is this surface flat”, a dial indicator is the correct choice. Many precision setups use both: a caliper or micrometer to set an initial dimension, and a dial indicator to confirm that a machine or fixture holds that dimension consistently as it moves or as parts are swapped in and out.
What do the numbers on a dial indicator mean?
The dial face is marked in graduations, and each graduation represents a fixed amount of plunger movement — this is the indicator’s resolution. A full turn of the needle corresponds to a set travel distance, and most dials also have a small secondary counter or marker to track how many full turns the needle has made, since one turn alone would not tell the whole story on longer movements.
Because a dial indicator amplifies tiny movement into a visible needle sweep, understanding what “resolution” actually buys you is useful background before comparing models. The relationship between how finely a tool can display a reading and how accurately that reading reflects reality is explained in more detail in this piece on accuracy, precision and resolution — worth reading before assuming a finer-looking dial is automatically the better one for a given job.

How is a dial indicator mounted and used?
A dial indicator does very little on its own — it needs to be held rigidly in a fixed relationship to whatever is being checked, then either the part is moved past the indicator or the indicator is swept across the part. Common ways to hold one include:
- A magnetic base, which clamps onto a machine’s cast-iron table or bed
- A finger clamp or holder that attaches to a lathe toolpost, mill spindle, or similar fixture
- A dedicated stand for bench-top checks of small parts
Once mounted, the plunger or lever tip is brought into light contact with the surface, the dial is zeroed at that starting point, and then the part is rotated, moved or swept so the needle shows how far the surface deviates from that zero. Reading the result is a matter of watching the needle’s swing, not a single static number, so a steady setup with no play in the mounting is what makes the reading trustworthy.
What is a dial indicator used for in automotive work?
In a home garage, a dial indicator most often turns up around engine and driveline checks — things like measuring shaft endplay, checking a flywheel or brake rotor for runout, or confirming that a crankshaft is turning true rather than wobbling. These are diagnostic checks that tell someone whether a part is within an acceptable range of movement, which is a different kind of information from what a torque wrench or a scan tool provides.
It’s often used alongside other diagnostic tools rather than instead of them. A compression tester reveals how well cylinders are sealing, for instance, while a dial indicator reveals whether a rotating part is running true — different questions, both useful during a proper diagnosis. Because these checks usually mean supporting a vehicle safely and holding a part steady while it’s measured, a stable work surface matters, and a bench vice used for automotive work is often part of the same setup.
What should you compare when buying a dial indicator?
Dial indicators vary in travel range (how far the plunger can move before running out), resolution (how fine each graduation is), and how the mounting hardware is included or sold separately. None of these numbers on their own says which indicator is “better” — they say which one suits the job at hand.
A long travel range is useful for sweeping across an uneven surface, but it usually comes with coarser graduations, since the needle has more ground to cover per turn. A very fine resolution is useful for checking tight tolerances on small parts, but too little travel range makes it easy to run the plunger out of its usable movement partway through a check. The mounting — magnetic base, clamp, or stand — needs to actually fit the machine or bench being used, so it’s worth checking what’s included before assuming a magnetic base will work on a non-magnetic surface.
For a broader look at how to weigh up specifications like these without chasing numbers that don’t matter for the job, the general guide to choosing a tool and what its specs actually mean is a useful starting point, and the wider measuring and precision archive covers related tools in more depth.
What can a dial indicator not tell you?
A dial indicator only reports movement relative to where it was zeroed and to how it’s mounted. It cannot tell someone an absolute dimension, and it cannot correct for a shaky or poorly secured setup — any play in the magnetic base or clamp shows up in the reading as if it were movement in the part itself, which makes the check meaningless.
It also can’t diagnose why a part is out of tolerance, only that it is. Working out the cause — a worn bearing, a bent shaft, an unlevel table — is a separate step that usually calls on other measuring tools and, on vehicles or machinery where the wrong call has real consequences, a qualified technician’s judgement rather than a single reading taken at home.
Readers building out a home measuring kit alongside other equipment may also find it useful to browse the hand tools archive and the automotive tools archive for related pieces on how individual tools fit into a wider setup.
Find Tool publishes general information, not professional advice. Power tools, mains electricity and workshop machinery are genuinely dangerous, and the safe settings, guards and procedures differ between models — always follow the manual and the markings on the tool in front of you rather than a general guide. Never remove or defeat a guard or safety feature. Anything involving fixed wiring, gas or structural work belongs to a qualified tradesperson. Wear the eye, ear and respiratory protection the task calls for.
Featured image: Photo by Lucasbosch, source, CC BY-SA 3.0