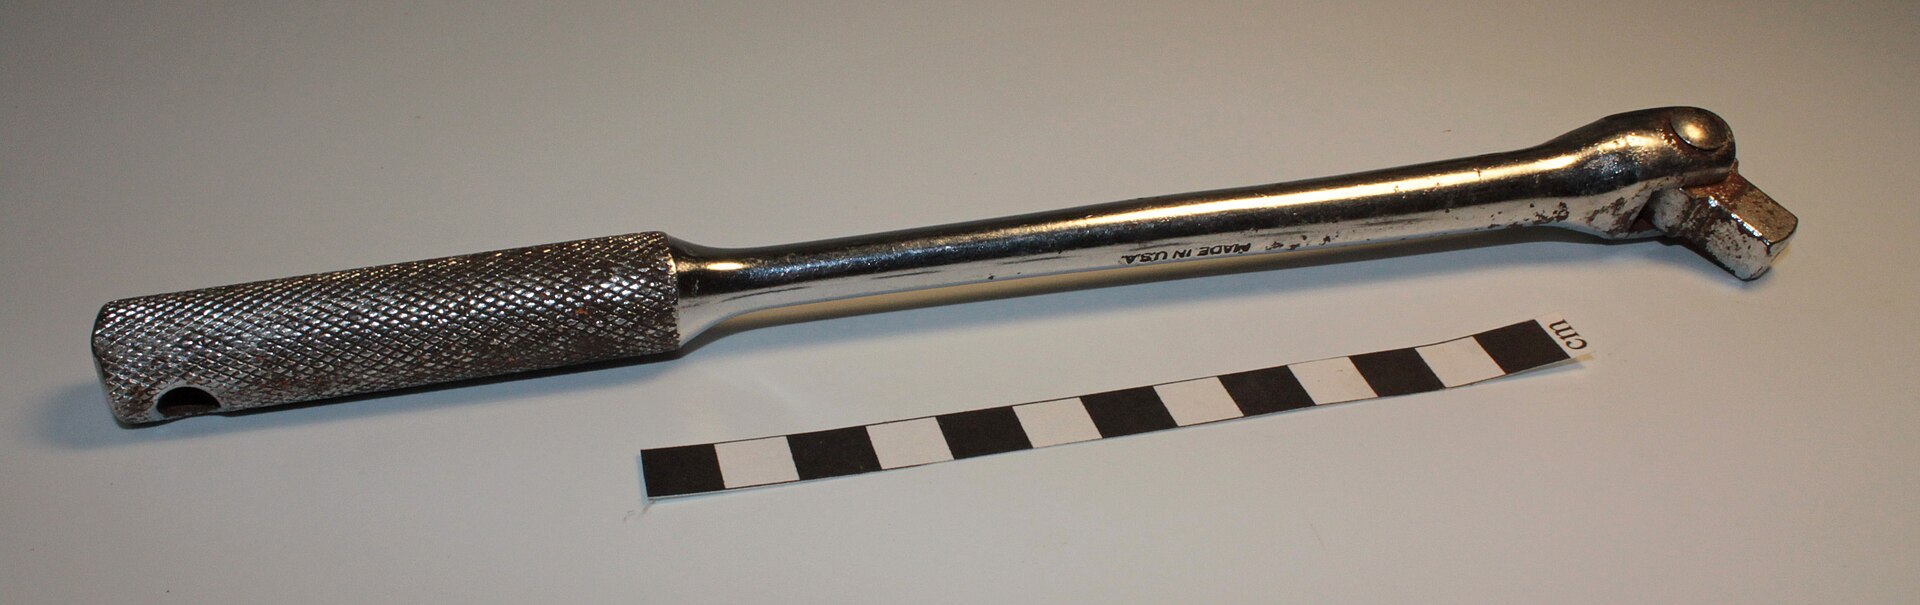
A breaker bar is a long, solid steel handle with a socket drive on one end and no ratchet mechanism inside it. Its length gives you extra leverage, which lets you apply far more turning force than a ratchet handle can, so it’s the tool reached for when a bolt or nut is seized, rusted, or simply done up harder than a ratchet can shift.
What actually makes a breaker bar different from a ratchet?
A ratchet handle has a small gearing mechanism inside its head that lets it click backward without moving the fastener. That mechanism is convenient, but it’s also a weak point — it isn’t built to take a huge twisting load. A breaker bar skips the gearing entirely. It’s just a solid steel shaft, usually with a swivel head, connecting your hands directly to the socket. No gears means no fragile part to shear, so the bar can safely carry far more force than a ratchet of the same drive size.
The trade-off is speed. A breaker bar can’t ratchet back and forth to spin a fastener out quickly once it’s moving — you have to lift it off and reset it for each swing, the same way you would with a plain wrench. It’s a tool for the first, hardest turn, not for running a bolt all the way out.
When do you actually need one?
You need a breaker bar when a fastener won’t move with a ratchet or a standard wrench, and you’ve already ruled out the easy explanations — wrong socket size, a left-hand thread, or a bolt that’s simply still under tension from something else. Typical situations include:
- Wheel nuts that were tightened with an impact wrench and are now seized on a hand ratchet.
- Rusted suspension, exhaust or chassis bolts on an older vehicle.
- Fasteners that have corroded or galled slightly in the threads, so normal turning force just isn’t enough.
- Old machinery or equipment bolts that haven’t been touched in years.
If you’re working on a vehicle at all regularly, a breaker bar earns its place in the same kit as sockets and spanners. It’s worth reading through how a socket, spanner and ratchet ring actually differ if you’re still building out that basic toolkit, since a breaker bar only makes sense once you already own compatible sockets.
How does drive size change what a breaker bar can do?
Drive size determines how much force the bar and socket connection can take before something gives. A larger drive size — moving from 3/8-inch up to 1/2-inch or 3/4-inch — is built for higher torque and pairs naturally with a longer bar and bigger fasteners.
Using an undersized drive with a very long bar is one of the more common ways to strip a socket or snap a drive lug, because the leverage the bar generates can exceed what that connection was designed to carry. If you’re not sure how drive sizes map to the jobs they suit, this guide to 1/4, 3/8 and 1/2-inch drive sizes covers what actually changes between them.

Can a breaker bar replace a torque wrench?
No. A breaker bar has no way of telling you how much force you’re applying — it’s a leverage tool for undoing stuck fasteners, not a measuring tool for tightening them accurately. Once a fastener is loose, torque-critical jobs like wheel nuts, cylinder heads or suspension components need a tool that actually reports the figure, and that figure needs to come from the vehicle or component manufacturer’s documentation, not a guess based on feel.
For more on why that distinction matters, see what a torque wrench is and why it matters on a car. A breaker bar and a torque wrench do opposite jobs on the same fastener: one gets it moving, the other puts it back correctly.
What are the real risks of using a breaker bar?
The main risk is the sudden release when a stuck fastener finally gives way. Because you’re applying a large amount of force through a long lever, when the resistance breaks — or when something slips or snaps — your hands and body can move fast and unpredictably. Barked knuckles, elbows hitting nearby components, and falls from awkward working positions are the common outcomes.
A few habits reduce that risk without needing any special equipment:
- Position your body so that if the bar suddenly moves, your hand travels away from sharp edges, hot components or other obstructions, not into them.
- Push rather than pull where the working position allows it, since a slip while pushing is easier to control than a slip while pulling toward your face.
- Apply steady, increasing pressure rather than sharp jerks — a controlled push is easier to stop than a sudden yank if the fastener lets go without warning.
- Check that the socket is fully seated and the correct size before loading the bar; a socket that’s slightly wrong can slip off under load and send the bar into your hand or the surrounding metalwork.
Eye protection is worth wearing for this job too. Rusted fasteners can shed flakes of scale or, occasionally, shear off entirely and throw debris. If you’re unsure what level of eye protection actually covers that kind of risk, this explainer on eye protection ratings lays out what the markings mean in practice.
What about extending a ratchet with a length of pipe instead?
Slipping a length of pipe over a ratchet handle to gain leverage — sometimes called a cheater bar — puts the same multiplied force through a mechanism that wasn’t built to take it. The ratchet’s internal gearing can shear, and because the pipe isn’t a fixed part of a purpose-built tool, it can also slip off the handle under load. A breaker bar achieves the same leverage through a shaft designed and rated to carry it, which is why it’s the safer route to the same result.
What should you compare when buying a breaker bar?
The specifications that matter for a breaker bar are simpler than for most power tools, but a few things are worth checking before buying:
- Drive size — match it to the sockets you already own, and to the size of fastener you expect to deal with most often.
- Length — longer bars give more leverage but need more clearance to swing, which matters in a cramped engine bay or under a vehicle on stands.
- Head design — a swivel head lets the bar sit at an angle relative to the socket, which helps in tight spaces where a straight shaft can’t clear surrounding parts.
- Material and build — a breaker bar takes real abuse, so a one-piece forged shaft is generally the more durable choice over a bar with welded or pinned joints.
None of these figures need to be taken on trust from a spec sheet marketing claim alone — for a broader look at which numbers on a tool’s box actually matter and which are filler, see which tool specifications are marketing, not useful. And if a breaker bar is only an occasional need rather than a regular one, it’s also worth weighing up buying new against what’s worth buying new versus fine second-hand, since a solid steel bar with no moving parts is one of the easier tools to buy used with confidence.
Does a breaker bar belong in a basic home toolkit?
Only if the work you do calls for it. A breaker bar is specifically for freeing stuck fasteners — it doesn’t replace a ratchet for everyday tightening and loosening, and it isn’t useful for anything that doesn’t fight back. For most home mechanics and hobbyists, it earns a spot once seized bolts have already turned a simple job into a frustrating one.
If you’re still working out what order to build a first toolkit in, or which category of tool to prioritise before the next, the broader hand tools archive and the buying tools guide hub are a better starting point than picking up specialist gear like this in isolation.
Find Tool publishes general information, not professional advice. Power tools, mains electricity and workshop machinery are genuinely dangerous, and the safe settings, guards and procedures differ between models — always follow the manual and the markings on the tool in front of you rather than a general guide. Never remove or defeat a guard or safety feature. Anything involving fixed wiring, gas or structural work belongs to a qualified tradesperson. Wear the eye, ear and respiratory protection the task calls for.
Featured image: Photo by Scientific29, source, CC BY-SA 3.0