A feeler gauge is a set of thin, precisely made metal blades, each one a different thickness, used to measure or check a small gap between two surfaces. You slide the blade into the gap; if it fits with a slight drag, the gap matches that blade’s marked thickness. It’s a low-tech, highly reliable way to check clearances that are too small to measure with a ruler.
What exactly is a feeler gauge?
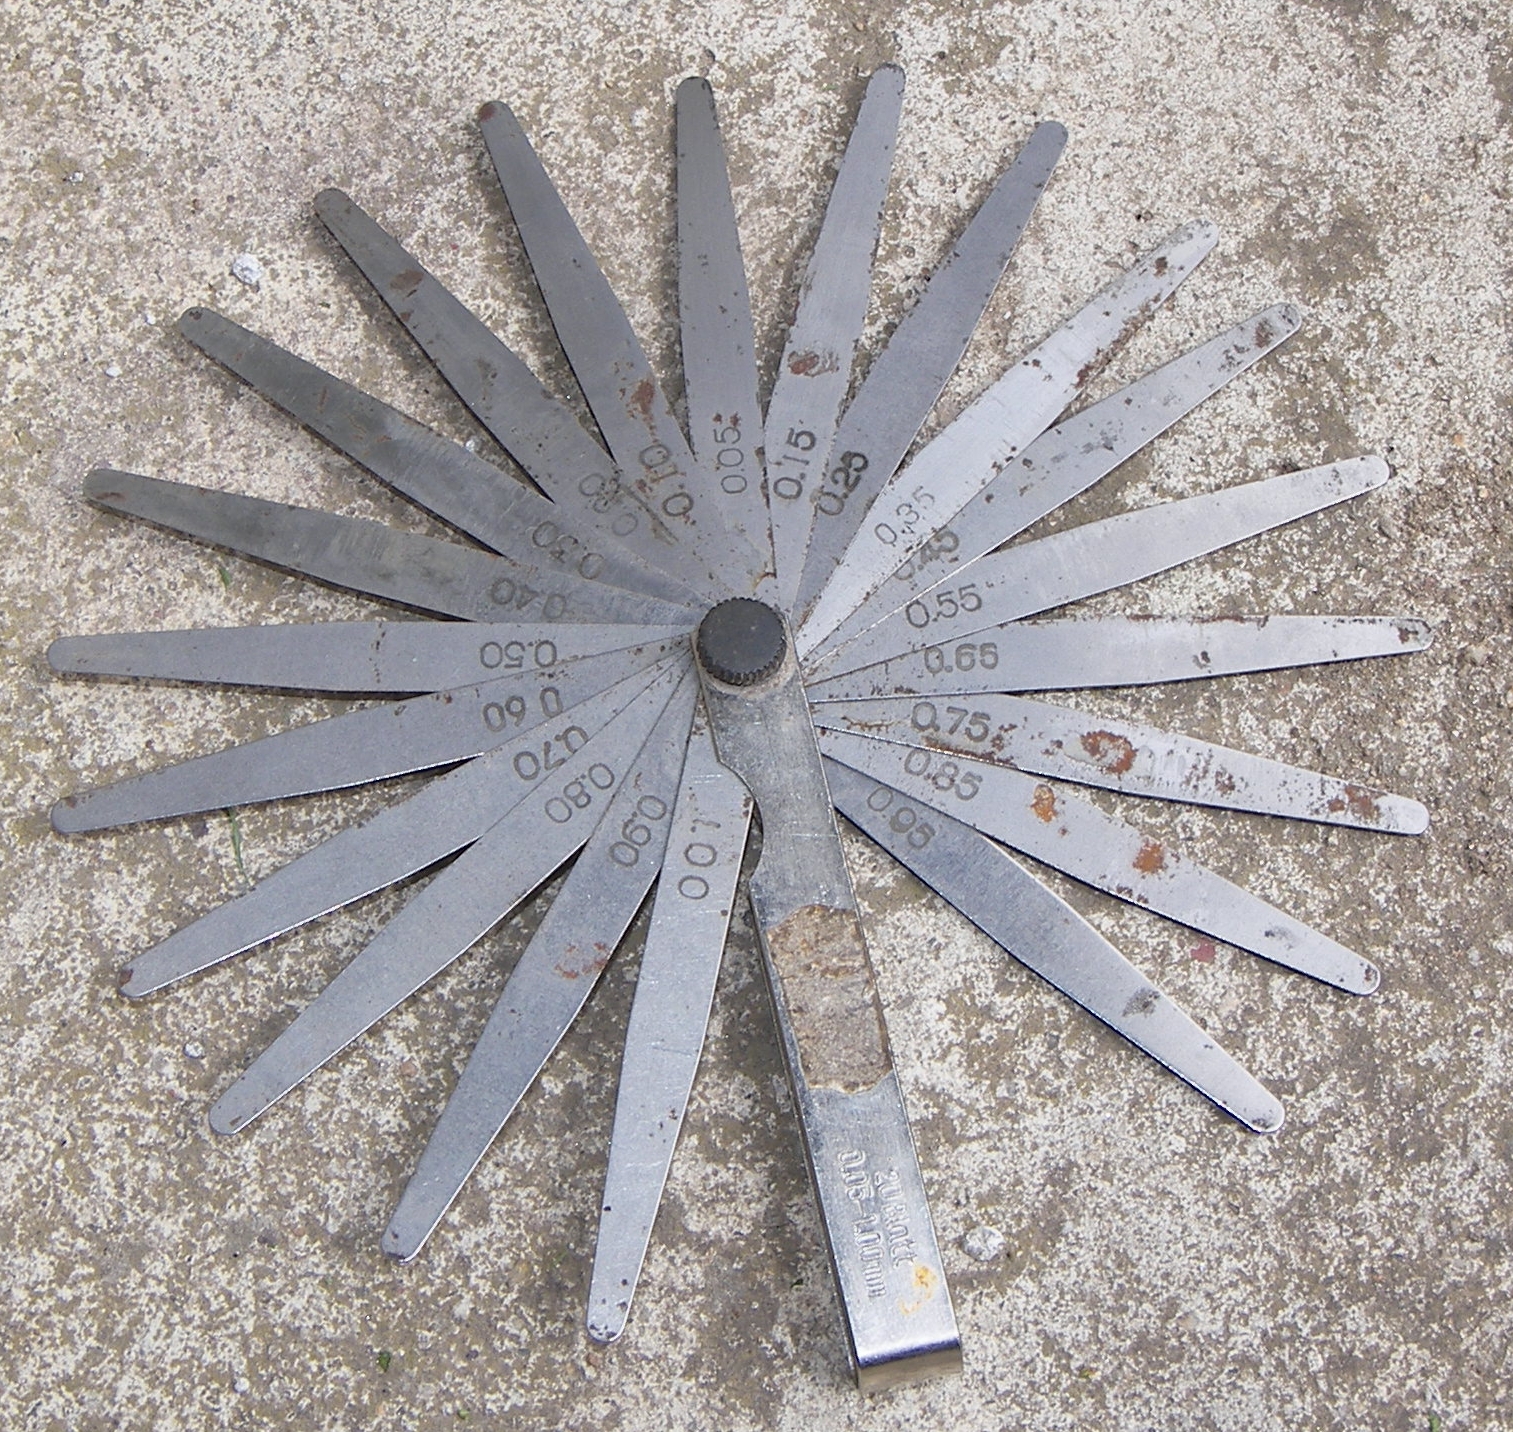
A feeler gauge is a pack of narrow steel (or sometimes brass) blades, usually hinged together like a small pocketknife, each stamped with a thickness value. Some sets are round like a keyring fan, others are flat and fold out individually. Each blade is ground to a consistent thickness along its length, which is what makes it useful for gap checking rather than just guessing.
The tool doesn’t measure length or diameter the way a ruler or caliper does. It measures a gap indirectly, by trial: you try blades (or combinations of blades) until one fits the space with the right amount of resistance. That “right amount of resistance” is a learned feel, which is part of why the tool has the name it does.
What is a feeler gauge actually used for?
Feeler gauges are used wherever a small, specific clearance needs to be checked or set — a gap that’s too thin to measure with an ordinary ruler but still needs to be within a defined range for something to work correctly.
- Checking and adjusting spark plug gaps on engines that still use conventional plugs.
- Setting valve clearances on engines that have manually adjustable tappets.
- Checking the gap on some ignition points or breaker contacts on older engines.
- Measuring the gap on certain mower and strimmer engine components during routine servicing.
- Checking flatness or squareness of machined surfaces, door hinges, or jointed woodwork, where a blade slipping into a joint reveals a gap that shouldn’t be there.
- General workshop fitting jobs where a specific, small clearance is called for in a manual or spec sheet.
In every case, the number that matters is the one specified by whatever you’re working on — the engine manufacturer, the machine’s manual, or the joint you’re fitting — not a number the feeler gauge itself decides. The gauge only tells you what the current gap actually is.
How does a feeler gauge actually measure a gap?
It works by substitution rather than by a scale or readout. Each blade is a known, fixed thickness. You insert blades one at a time (thinnest first is the usual habit) until you find the one that just fits the gap with light drag — not loose, not forced.
If two blades stacked together fit better than either alone, the gap is the sum of both thicknesses. This is normal and expected; feeler gauge sets are designed so blades can be combined this way when a single blade doesn’t land exactly on the gap you’re checking.
The “feel” is genuinely part of the measurement. A blade that slides in with no resistance at all suggests the gap is larger than that blade’s thickness. A blade that won’t go in, or that you have to force, suggests the gap is smaller. The correct fit sits between those two: a light, even drag as the blade passes through.

How do you actually use one correctly?
Good technique matters more with a feeler gauge than its simplicity suggests, because the result depends on a consistent, gentle feel rather than a number on a display.
- Clean both surfaces first. A speck of debris in the gap will give a false reading.
- Select the blade thickness specified for the job — from the manual, the manufacturer’s spec, or the relevant reference for that component.
- Slide the blade in and out smoothly, without forcing it. Feel for light, even resistance across the full width of the blade.
- If the specified blade is too loose, try the next size up. If it won’t go in at all, try the next size down or check whether the gap needs adjusting.
- Where an adjustment is being made — a spark plug gap, a valve clearance — recheck with the gauge after every adjustment rather than assuming it’s correct.
On engine work in particular, take care around hot components and moving parts, and let an engine cool before working close to it. This is routine mechanical sense rather than a feeler gauge issue specifically, but it’s worth keeping in mind whenever the tool is being used under a bonnet or inside a mower deck.
Does a feeler gauge replace a caliper or micrometer?
No — it does a different job. A feeler gauge tells you whether a specific, known-size blade fits a gap; it doesn’t give you an arbitrary measurement of an unknown gap the way a caliper or micrometer measures an unknown length or diameter. It’s a go/no-go check against a known reference, not a general-purpose measuring instrument.
For unknown dimensions — the width of a workpiece, the diameter of a shaft, the depth of a recess — a vernier caliper or a micrometer is the right tool, and it’s worth understanding what a vernier caliper actually measures and how to read one and what a micrometer is measuring that a caliper cannot before assuming either tool covers a feeler gauge’s job. For gaps that move or need tracking over time, a dial indicator does a different job again — see what a dial indicator is actually used for. The distinction between what each of these tools can resolve is really a question of accuracy, precision and resolution — three different things that get used interchangeably but aren’t the same.
What should you compare when buying a feeler gauge set?
Feeler gauges are inexpensive and fairly standard, but a few real differences are worth checking rather than picking on price alone.
- Blade range and increments — check the set covers the thicknesses you’ll actually need, including fine increments if you work on ignition points or precision clearances rather than just spark plug gaps.
- Material — steel blades are common and durable; brass (non-sparking) blades exist for specific electrical or hazardous-area work and aren’t needed for typical home workshop or automotive use.
- Build format — a hinged pocket set is compact and fine for most jobs; a wider, longer-bladed set is easier to handle for bigger gaps or awkward access.
- Marking clarity — thickness stamps that are easy to read matter more than they sound, especially in a dim engine bay.
- Straightness and flatness of the blades — a bent or nicked blade gives an unreliable feel and is effectively unusable for that thickness.
None of this requires spending heavily; feeler gauges are a low-cost, long-lived tool as long as the blades stay flat and clean. For a broader look at how to weigh up specifications versus marketing claims when choosing any measuring tool, the buying tools guide covers what’s actually worth comparing.
How do you keep a feeler gauge accurate over time?
A feeler gauge stays useful only as long as its blades stay flat, clean, and free of nicks. A few habits protect that:
- Wipe blades clean after use, especially after engine work where oil and grit collect on them.
- Store the set folded closed, ideally in a small case, rather than loose in a drawer where blades can bend or pick up rust.
- A light film of oil helps prevent surface rust on steel blades if the set will sit unused for a while.
- Check periodically for burrs or bent tips — a damaged blade will give a false “loose” or “tight” reading that has nothing to do with the actual gap being checked.
These are the same basic principles that apply to most precision hand tools, and they’re covered in more general terms in the tool care section of the site.
Where does a feeler gauge fit among other workshop measuring tools?
A feeler gauge is one of the simplest members of a much bigger family of measuring and checking tools that a home workshop gradually accumulates — rulers, calipers, micrometers, dial indicators, torque tools. Each one answers a different kind of question, and understanding which tool answers which question saves buying the wrong thing. The tool guide hub is a good starting point for seeing how these tools relate to each other, and the measuring and precision category covers the rest of that family in more depth. For anyone whose feeler gauge use is mostly automotive — spark plugs, valve clearances, points — the automotive category has related tools and checks worth knowing about, and if buying decisions across a wider toolkit are the current question, the buying and comparing category is the place to look next.
Find Tool publishes general information, not professional advice. Power tools, mains electricity and workshop machinery are genuinely dangerous, and the safe settings, guards and procedures differ between models — always follow the manual and the markings on the tool in front of you rather than a general guide. Never remove or defeat a guard or safety feature. Anything involving fixed wiring, gas or structural work belongs to a qualified tradesperson. Wear the eye, ear and respiratory protection the task calls for.
Featured image: Photo by Selit, source, CC BY-SA 3.0