A combination square is a measuring tool with a sliding ruler and a fixed head that checks 90° and 45° angles, marks lines parallel to an edge, and gauges depth. It ends up as the most-used bench tool because almost every job — cutting, joining, checking — starts with a straight, accurate reference line.
What is a combination square made of?
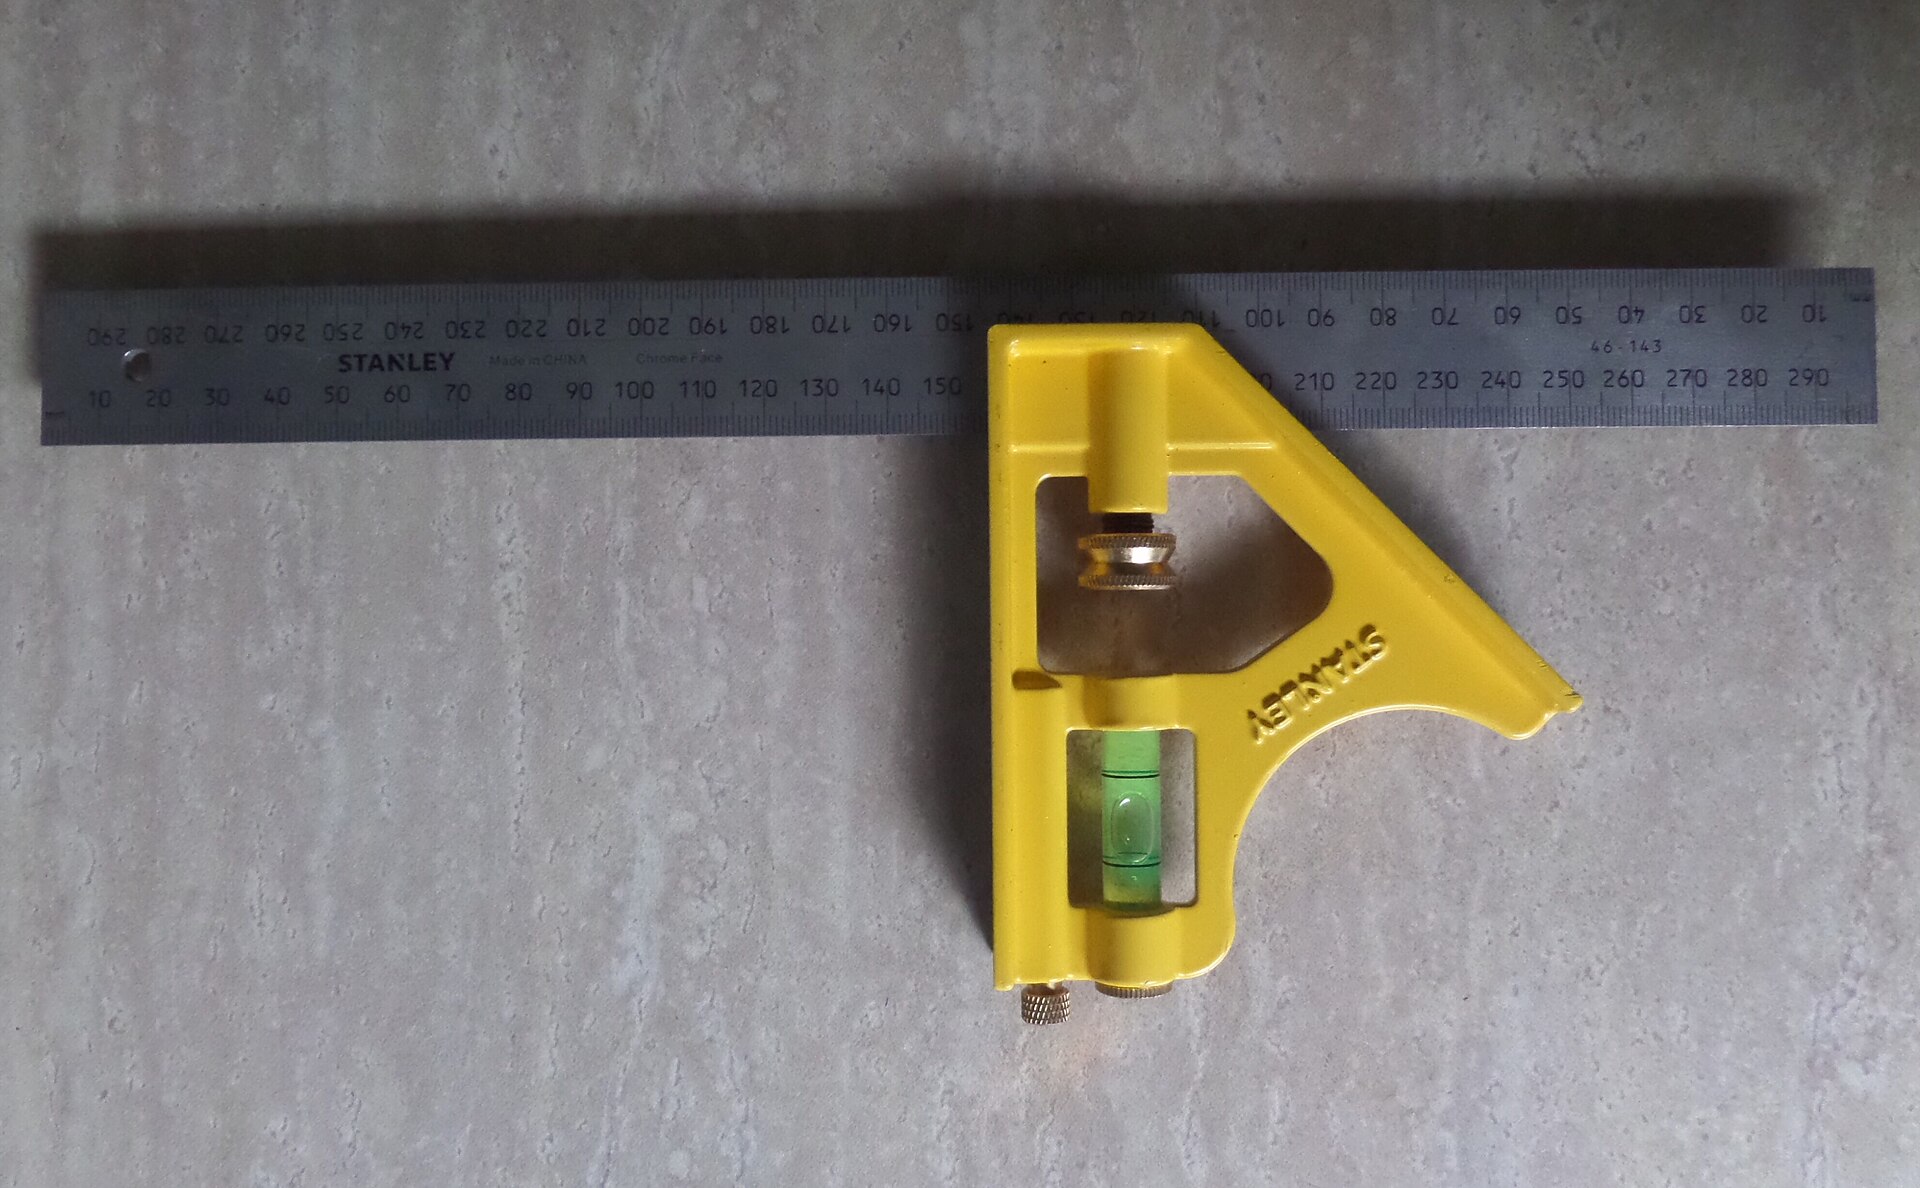
A combination square has two main parts: a steel ruler (often called the blade) and a head that slides along it and locks in place with a thumbscrew. The head has a milled face set at 90° to the blade, and another face set at 45°.
Many heads also include a small spirit level bubble and a scriber — a thin steel pin that stores in the handle and pulls out for marking a line into wood or metal. None of this is complicated machinery. It is precision metalwork doing a very simple job well: holding a straight edge at a known angle.
Because the head locks anywhere along the blade’s length, the tool works as a ruler, a square, a depth gauge and a marking guide, depending on how it is set. That versatility is the whole reason it gets picked up more often than almost anything else in a modest home workshop.
What does a combination square actually do?
It checks that an edge is square, marks a line at a set distance from an edge, and measures how deep a hole, groove or rebate goes. Three unrelated jobs, one tool, because all three depend on the same sliding-head mechanism.
- Checking square: the 90° face sits against a board’s edge, and the blade shows whether the adjacent edge is truly at right angles to it, or where it’s out.
- Marking parallel lines: lock the head at a set distance, run the scriber or a pencil along the end of the blade, and it draws a line that stays exactly that distance from the edge for the whole length of the cut.
- Depth and height checks: the blade can be slid down into a mortise, rebate or step and locked, then lifted out and read against a ruler, or used directly to compare one surface’s height against another.
- 45° reference: the second face on the head gives a quick check or mark for a mitred corner without swapping tools.
None of these are dramatic operations. They are the quiet, repeated checks that happen before a single cut is made — which is exactly why the tool gets so much use.
Why is it used more than a tape measure or a try square?
Because it combines what a tape measure, a try square and a marking gauge each do separately, and it holds its setting. A tape measure alone can’t guarantee a line stays parallel to an edge; a fixed try square can’t measure a fixed distance or depth.
Once the head is locked at a setting, that setting doesn’t drift while the tool moves along the material. That single feature — a repeatable, lockable measurement — is what separates a combination square from most single-purpose hand tools on the bench. A user can set it once for a batch of identical rip cuts or dado depths and use it repeatedly without re-measuring each time.
It also travels well between tasks. The same tool that checks a table leg for square can, a minute later, gauge the depth of a hinge mortise or confirm a mitred picture frame corner closes cleanly. Few other hand tools cover that much ground.

How accurate is a combination square, and does that matter?
Accuracy depends on build quality and how well the head has stayed true to the blade over time — it is not a fixed number that applies to every square equally. What matters in practice is whether the tool still reads truly square against a known reference edge.
Cheaper stamped squares can be accurate enough for rough carpentry but may have small errors in the milled faces that only show up over a long cut, where a fraction of a degree at one end becomes a visible gap at the other. Better squares are ground more precisely and hold their setting under the thumbscrew without flexing.
A simple check is to draw a line against the square’s edge, flip the square over, and draw the line again from the same reference edge. If both lines match exactly, the square is true. If they diverge, the tool — or the edge it was tested against — is out, and it’s worth knowing which before trusting either.
This kind of independent check matters more than any number printed on the packaging. For more on how to judge measuring tools generally, and what claimed specifications are actually worth comparing, the tool buying guide covers the trade-offs that matter across categories, not just this one.
What should be compared when buying one?
Compare the head’s fit on the blade, the readability of the markings, and whether the blade is replaceable — not the price alone or a marketing claim about tolerance. A loose head is the single biggest problem, because it undermines the tool’s whole purpose.
- Head-to-blade fit: the head should slide smoothly but lock without any wobble or play once tightened. Play here means every measurement taken with the tool is slightly unreliable.
- Blade markings: etched or engraved markings survive years of handling; printed markings can wear off with use.
- Blade material and finish: a hardened, corrosion-resistant blade stays flat and legible longer, especially if it sees any damp workshop conditions.
- Replaceable blade: some squares let the blade be swapped or replaced if it’s bent or damaged, which extends the working life of the head and scriber.
- Included scriber and level: useful additions, but only worth paying for if they’ll actually get used — a missing scriber is easy to substitute with a sharp pencil.
None of these are things a single spec sheet number settles. They’re best judged by handling the tool, checking the lock for play, and testing the square against a known straight edge before relying on it for real work. The buying guides section has more on separating genuine differences from marketing language across tool categories.
How does it fit alongside other measuring and marking tools?
A combination square handles right angles, depth and parallel marking; other tools cover jobs it isn’t built for, like long-distance measuring or marking angles other than 90° and 45°. It’s a core tool, not the only one needed.
A tape measure still wins for anything longer than the blade. A sliding bevel gauge is needed for angles that aren’t 90° or 45°. A marking gauge with a fence is often preferred for repeated parallel lines on wide boards, since it’s designed for nothing else and can be faster once set.
Where a combination square earns its keep is in the overlap: checking that a cut is actually square before it’s made, not just after. That habit — measure and check before cutting — matters just as much when the next tool in hand is a saw. For related reading on how cut quality is affected by the tool doing the cutting, see the pieces on the difference between a rip saw and a crosscut saw and on why a Japanese pull saw cuts differently.
Does using a combination square need any safety precautions?
The tool itself poses little risk on its own — it has no moving cutting edge. The main hazard is indirect: relying on an inaccurate square can lead to a workpiece binding or shifting unexpectedly once it reaches a saw or a powered cutting tool.
A board marked as square but actually slightly out can pinch a saw blade during a cut, which is one of several conditions that contribute to kickback. Anyone working near a table saw or circular saw should understand what causes that kind of reaction independently of how the material was marked; the article on what causes kickback explains the mechanics in more detail.
Standard PPE for any cutting operation still applies regardless of how carefully the material was marked beforehand — eye protection for anything that throws chips or dust, hearing protection for sustained machine noise, and a dust mask or respirator when cutting MDF, hardwood, or any material producing fine dust. The safety and PPE section covers this in more depth for specific tools and materials.
Where does a combination square fit in a modest home workshop?
It belongs near the bench, not in a drawer, because it gets used before almost every cut, joint and assembly step — far more often than most power tools see daily use.
For a first workshop, one well-fitting combination square with a legible blade covers the majority of squaring, marking and depth-checking needs. Specialised marking gauges, bevel gauges and engineer’s squares can be added later as specific projects call for them.
Anyone building out a broader understanding of how hand tools and measuring kit actually work — not just this one — will find the tool guide hub a useful starting point, alongside the hand tools archive for tool-by-tool detail and the comparisons section for how different tools stack up against each other on specific jobs.
Find Tool publishes general information, not professional advice. Power tools, mains electricity and workshop machinery are genuinely dangerous, and the safe settings, guards and procedures differ between models — always follow the manual and the markings on the tool in front of you rather than a general guide. Never remove or defeat a guard or safety feature. Anything involving fixed wiring, gas or structural work belongs to a qualified tradesperson. Wear the eye, ear and respiratory protection the task calls for.
Featured image: Photo by HutheMeow, source, CC BY-SA 4.0